
Once upon a time, long, long ago, I made a dress form in the shape of me from a whole lot of gummed paper tape. I followed this tutorial from Threads magazine, and if you’re thinking of doing this, but plaster casts and expanding foam feels a bit too much, that might be a good way to go. Certainly I liked mine and used it lots, but you couldn’t stick pins in it and it eventually deformed after being stored in less than totally dry conditions. Also it was me-without-a-corset-shaped and I wanted one me-in-a-corset-shaped so I can make more badass historybounding clothes for everyday awesome-wear.
Also, YouTube had helpfully suggested I watch Morgan Donner’s comprehensive and excellent video on how she made her Morgan-shaped dress form and I was all like “I could totally do that.”
If you are thinking of doing this and wondering whether plaster casts and expanding foam are too much for you, I’d highly recommend watching her video as it gives a pretty good idea of what’s involved, and I do not go into as much detail about the process here because she already did a top-notch job. I do, however, have some stuff to add, so come on back here when you’re done.
The plaster casting bit was fun, messy and definitely wanted two extra paris of hands if you can find two willing accomplices. I pretty much followed Morgan’s technique, except I added some thick nylon rope lengths around the areas that didn’t already have compound curves, like the back, bum and tummy areas, which I figured would be prone to slight mis-shaping during drying, as happened to Morgan.
I’d cite some engineering study on the inherent stability of corrugated materials, but engineering papers are truly, impenetrably boring and I couldn’t trawl through them to find a good citation. So just take my word for it. Corrugation makes things rigid.
For said corrugation, we added these rope sections, cut to length on the fly, after about 3 layers of bandage, so as not to have them showing through on the inside. We bandaged them on with a couple more layers and it worked a treat.

In fact, I could have done with a couple of rope “straps” up the shoulder blade area, because that bit did end up a bit flexible.

I also would have gone a little higher up the neck (though I already had to trim some hair to get out of the thing) and a little further down the arms, without creating the issues Morgan had with her arms. By the way, I assume Morgan shaves her pits anyway, but I don’t and I will just say: shave ’em first. Do it.
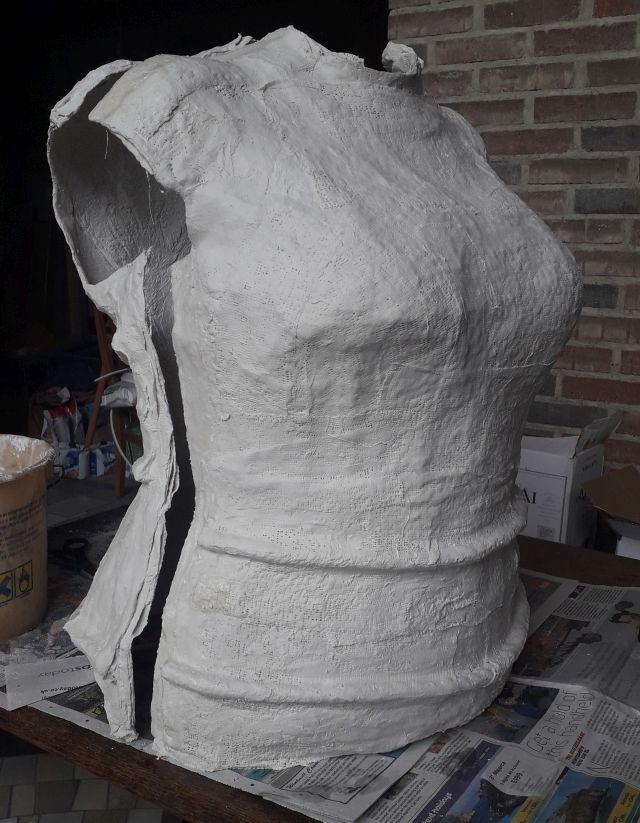
On the subject of whether to go into *every* crevice with the bandages: don’t. My lack of cleavage, reflected in the above picture, resulted in just resting the wet bandages over the area. Whereas the depression between my shoulder blades, which my partner was very careful to preserve, just ended up getting lost at the fabric covering stage anyway.

In sunlight, it was pretty easy to see where it needed a few more bandages, and it is important that you don’t leave holes, because the expanding foam will leak out of any gap it finds, or even deform whole areas if the mould is not rigid enough.
I was super careful in how I instructed my team to form the overlap at the side seams, and that went really well for the most part. See Morgan’s video and just try to make your lines as crisp as possible.
While it was still in two halves, I smoothed the inside surface with plaster mix, as per Morgan’s video. I didn’t wait til my mould was completely dry, I waited overnight and it was still clammy and obviously not yet dry, but it was well and truly set and rigid. I wasn’t able to do a super-good job with the plaster smoothing and it was a pain in the aaasssssss. I’d recommend doing everything you can to get a good, smooth finish during the plaster bandaging by careful placement and smoothing of bandages, and by NOT MOVING until they are set, which is really not that long. Have a full length mirror set up so you aren’t tempted to be craning to see all the time.
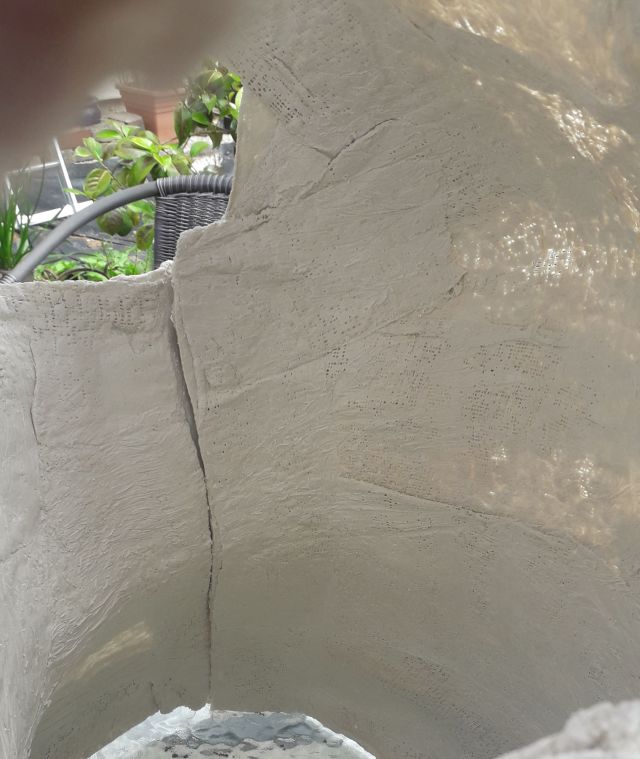
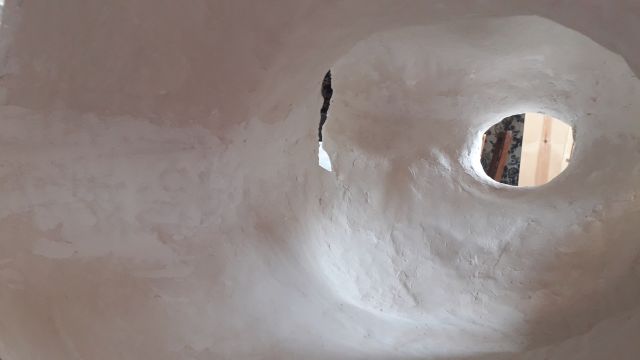
From the inside, you can see where I did have some slight deforming in the direction I didn’t predict would be a problem. And it wasn’t really a problem because it was slight and there was enough flexibility to just clamp it with twine while I sealed the seam.

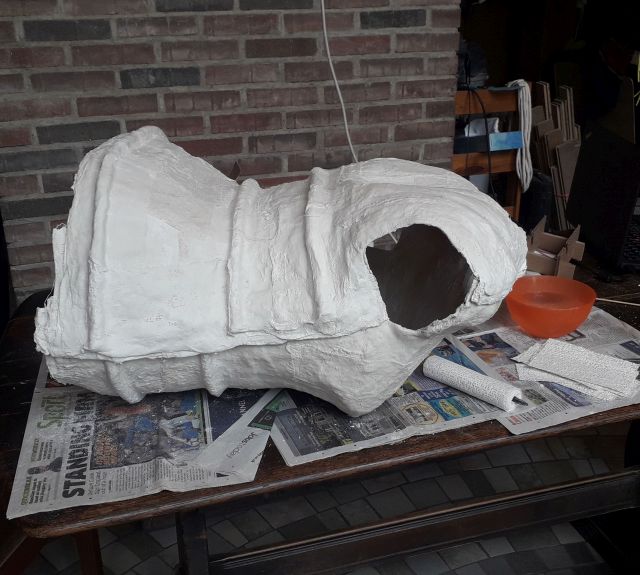
After I’d stuck the mould together with a fat seam of bandage up the outside, I opted to use plaster to fill in the crack so as to minimise sanding later, and I’m glad I did. I hate sanding.
I also made cardboard ends for the neck and shoulder holes and bandaged them in place really well.
I then sealed the inside surface, like the baker I am, by buttering and flouring it, albeit with vaseline and corn starch. The vaseline I applied with my hands, aiming to definitely cover every single inch, but not to leave a thick layer anywhere. The cornstarch I sprinkled over every surface using a tiny tea sieve and then shook the excess around and tapped it out gently. This worked *extremely* well and I Would Recommend.
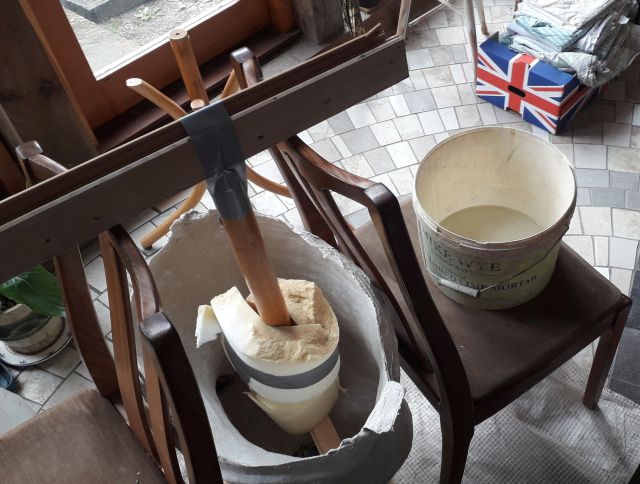
I was worried about standing her on her neck with no support, so I took my electric carving knife to a bit of bed foam (yes, that’s the life I lead…) and made a support pillow for her to rest on during filling.

I propped her between two chairs and suspended the pole (in my case a wooden pole which had once been a hat stand) augmented with a cross piece securely screwed to the end. Sorry, I forgot to take a picture of that, but it was basically a t-shape. And then I further augmented it with some leftover foam in an effort to minimise the risk of running out of expanding foam. This monster of a pole system I suspended from a rig spanning the chair backs. Yes, that’s duct tape.
I was scared, in the normal way, at this point: we’ve done so much and it’s gone so well leading up to this point. What if it all falls to bits when I put the stuff in? What if it floods all over the floor? What if it doesn’t foam? What if it turns into a zombie and eats me? Ok, you get it, the normal, paralyzing, irrational fear attack. I got over it and so should you.
I mixed a good 500ml each of part A and part B, having seen how little Morgan’s 8oz (250ml) foamed up. I really wanted to do this in fewer pours than she did.
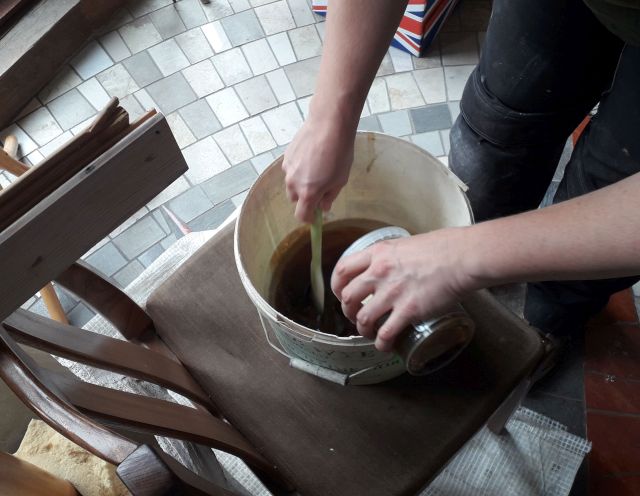
As I mixed it, it started to turn milky and as soon as I was convinced it was pretty well mixed (maybe 20 seconds) I poured it in and scraped the bucket as well as I could with the silicone spatula I keep for such tasks.

By the way, my buckets did not end up re-usable. If you had a pristine, smooth bucket, you might well have got away with it, just cracking the set foam off the surface, but my buckets are well used and very keyed on the interior surface. No chance of cleaning it out. Sad face.
It started to foam and grow its way up the mould really quickly and had reached maximum expansion within five minutes.

It started pushing the pole rig up as it rose, so I had to leap in and hold it down.

The first pour took up what I estimated to be a little over half the volume, so I mixed probably about 400ml each of the two parts for the second pour.
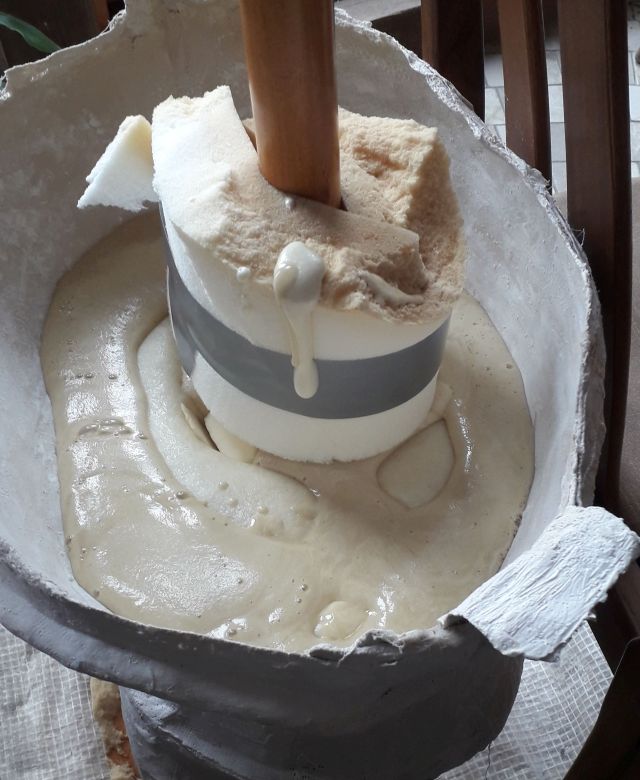
I continued to hold the pole in place, although I suspect it was pretty well secure by that time, as the first pour had gone stiff. I waited maybe 20 minutes in total between first and second pours. I did everything as quickly as I dared. As you can see, I nailed the volume estimate. I think it’s probably safe to be a tiny bit generous on that score, because by the time it reached the top, and in fact pushed just beyond the top, it had stiffened to the point where it just sort of extruded straight up in the same shape as the top of the mould. I’d rather that, and maybe have to take a knife to it here and there, than try to do a tiny last pour to take up the one inch left.

I left it overnight again at this point, just to give the foam a good long time to set properly. The packaging said 24 hours but who’s got that kind of time? 12 hours was fine.
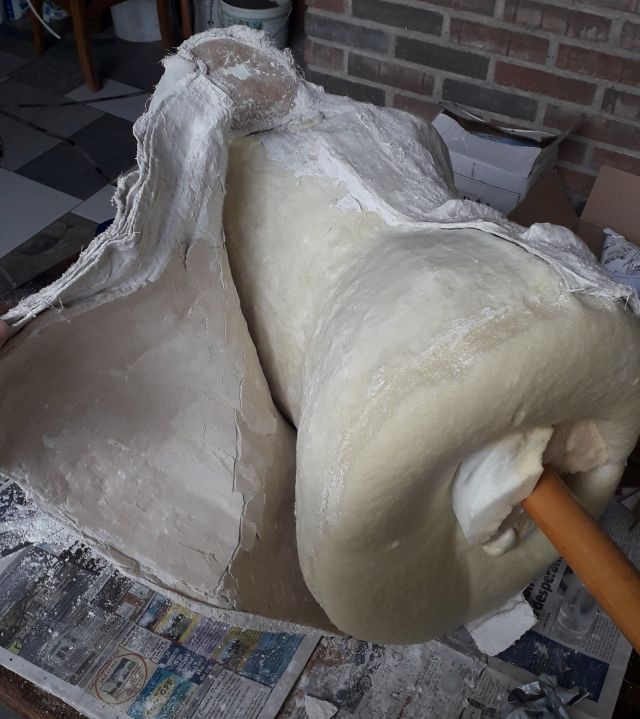
As I said, the vaseline and cornstarch sealing did the trick. It was *really* easy to get the plaster off the foam in all places except the very small area that didn’t get vaselined. Bound to happen.

At this point, our dining table was really not usable for anything else and my co-habitants were very forbearing.
Next came sanding, which was not as easy as I anticipated, and I’m very, very glad for every little thing I did to avoid having to sand much. I hate sanding.

But she came up a treat and I was perfectly satisfied with her regardless of her minor flaws.

I thought about trying to fill in the divot between the shoulder blades, and am glad I didn’t go there because I doubt I could have made a good job of it and I would be sanding still.

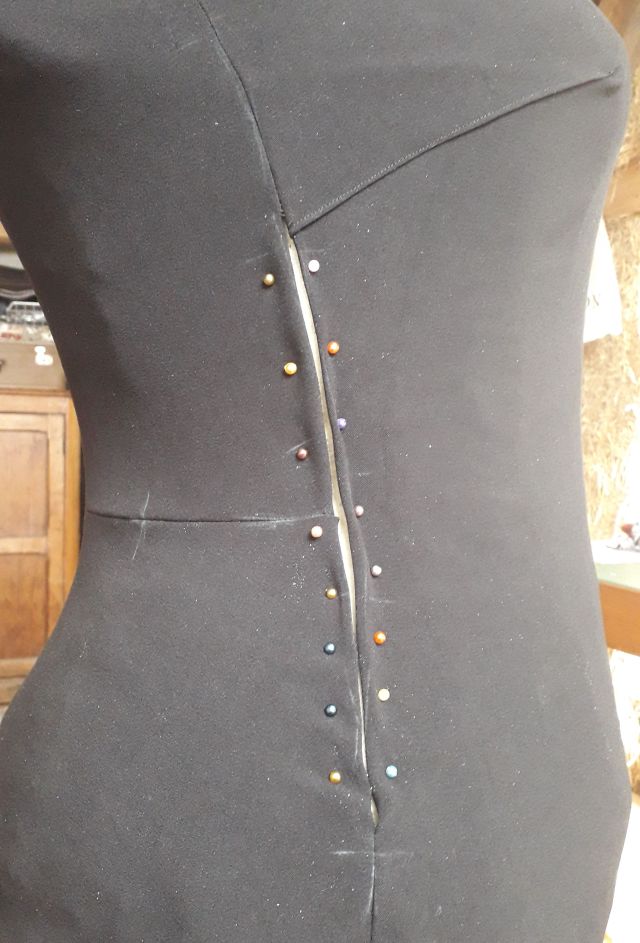
The corset bones are just a bit visible, and I considered adding a layer of sweat-shirt fabric or similar to smooth out inconsistencies, but I decided that would be too much of a pain.

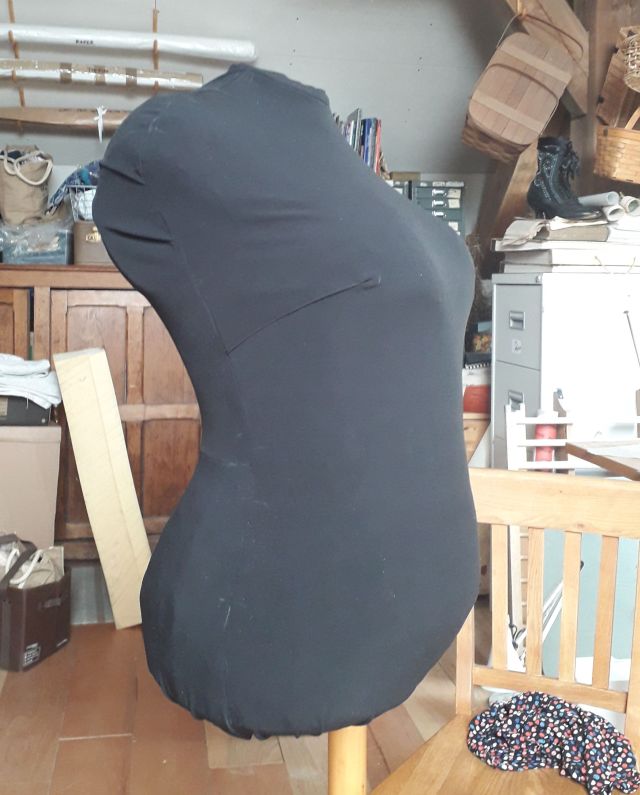
And anyway, she looked fine with this medium-weight, slightly stiff, black stretch suit weight polyester stuff I had lying around. I followed Morgan’s general technique, though my fabric was probably a little less stretchy and also I am super-curvy, so I ended up deciding it couldn’t be done without some darts and tucks, and a whole two pieces for the back.

I had to leave the waist un-closed for getting the cover on past the MASSIVE shoulders (butch, yes, I have been described that way. I have built a whole house, you know…) but it was pretty easy to slip stitch it shut after the fact, because you can stick pins in this dress form!! So good!!
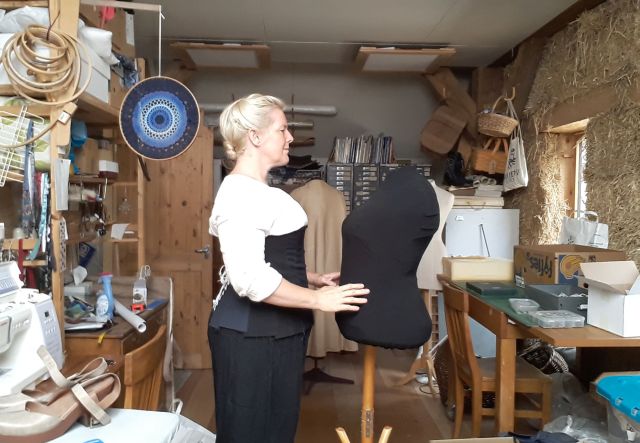
So here she is. I am extremely pleased and extremely grateful to Morgan Donner for making a truly comprehensive instructional video, and just generally being one of my favourite YouTubers.
My new girl has settled in amongst the other dress dummies and is getting to know them.

And very shortly I will put her to work as I plough through some of the mountains of amazing fabric I’ve got stashed in boxes.
I still have a house to be building, so it may not be next week, but stay tuned…
